How to Use Obs to Record and Upload

How to Use OBS Studio to Record or Stream Alive Presentations
Posted 1 year ago in
With quarantine measures and social distancing taking place all over the world, this is definitely the flavour for online conferences and virtual events. There's also a lot of folks getting into streaming these days, or at to the lowest degree trying to do then - for beginners, streaming tin seem difficult, and some streaming tools can definitely expect intimidating at a first sight.
OBS (Open Broadcaster Software) is a powerful open source video streaming and recording software, available for Linux, macOS and Windows. Even though OBS is one of the best alternatives for live streaming today, it might not look very intuitive for those who don't have a previous experience with video editing.
In this tutorial targeted at beginners, you'll learn how to ready OBS and utilise it for recording live presentations and / or streaming straight to Twitch and other platforms.
Getting Started with OBS
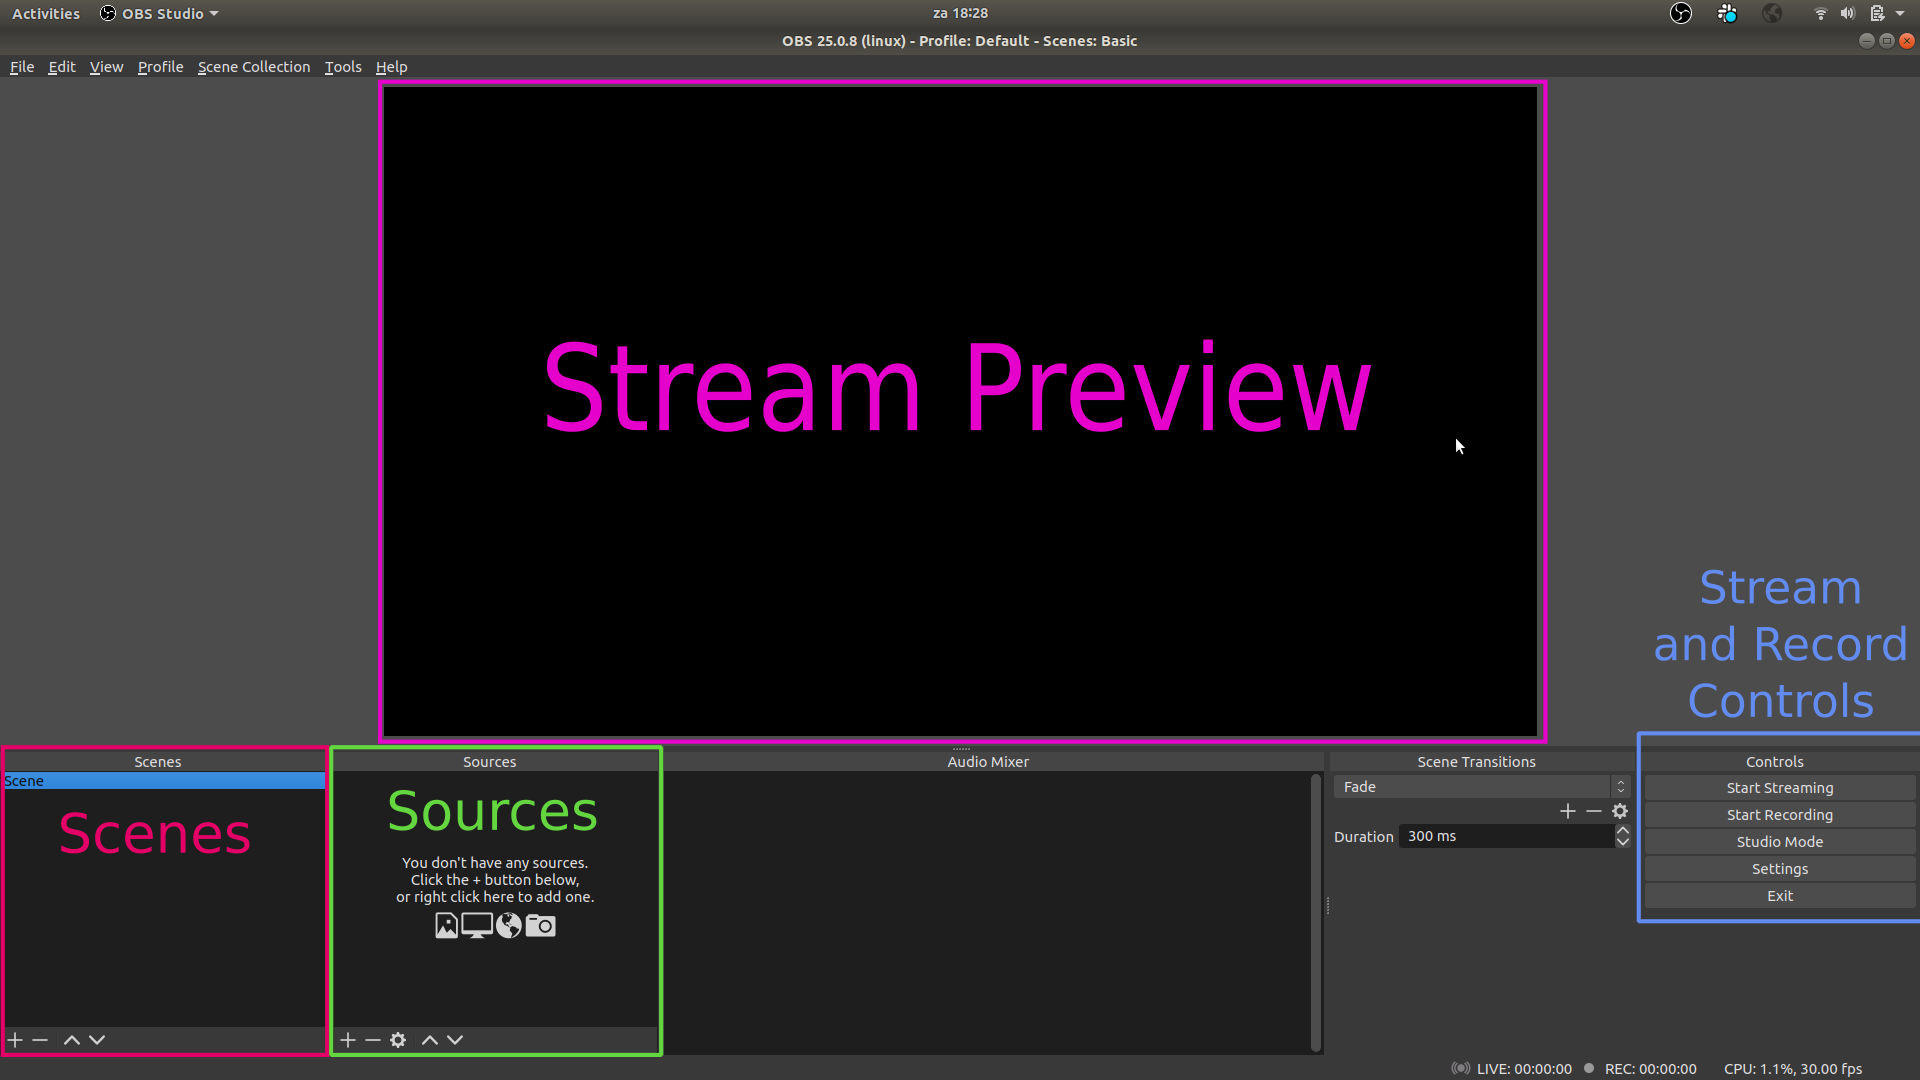
At the center of the screen, you'll se the live preview of your recording / stream. On the lesser left, you take the scenes and sources lists. The audio mixer goes in the middle and on the bottom correct you'll encounter the transition settings and the control buttons for starting / stopping recording and streaming, and to admission the settings page.
Configuring Scenes and Sources
A scene is a item view / way to present: information technology tin contain one or more sources. A source can be your webcam, an paradigm, a video, a slideshow, a desktop window, your unabridged screen, among other things.
Before streaming or recording with OBS, you'll have to configure your scenes. You will exist able to configure multiple scenes and switch betwixt them while streaming. And so, for instance, y'all might be showing your browser window, and so switch to a scene that is configured to show your terminal window.

You lot tin besides make composite scenes with your screen and your webcam, for instance, or multiple application windows. OBS is highly customizable, so you have loads of options to fix upwards your scenes and prove exactly what you want to show.

While streaming, y'all can switch between scenes past clicking on the scene you want to show next.

But be enlightened that if you set upward too many scenes, it might go overwhelming to manage while you lot are live streaming. Information technology's good to prepare upwardly a manageable number of scenes and practice a flake to make sure you select the right ones when you're alive. The worst that might happen (and happened to me a few times) is forgetting to switch, say, from the browser window to the terminal window, when yous want to show some live commands (just realizing your mistake several minutes afterwards). If you're using multiple displays, it's easier to manage the switch betwixt scenes, since you can keep OBS's window visible at all times and thus keep track of what is being streamed.
Example Scene Setup

When streaming for DevOps & Chill, here's the scenes I have set:
- Intro - this scene uses a slideshow source with 2 images: a cover image with the title / topic I'll be covering, and some other image saying we'll be starting shortly. I start the streaming a few minutes before with this slideshow, to give people time to join while making sure they know I'll exist starting in a few minutes.
- Annotations - this scene uses a window source to prove a text editor where I type explanations about what I'g doing - I don't talk in this stream, and so I needed a way to include more than details about what I'one thousand doing.
- Browser Window - this scene is configured to show my browser window.
- Final Window - this scene is configured to show my Terminal Window.
- Stream Finished - I use this scene when the stream is finished. It uses an image source.
I don't use webcam or microphone in this stream. For live talks, all the same, I'm using a different set of scenes, which and then includes a webcam scene and also browser + webcam.
You can create and switch between different scene settings inside the menu "Scene Collection".

Audio and Soundtrack
OBS allows y'all to set up multiple sound tracks, so you can have for case a music playback and audio input from your microphone. Yet, streaming music involves copyright concerns, and you don't want to get your video offline or muted due to copyright infringements. There are some royalty-free options you can use for streaming, thou.
Pretzel.rocks is a royalty-free music service that you can utilize with Twitch, Youtube and other services.
You can likewise download royalty-free music tracks and create a playlist to play while you're streaming.
In either case, there are two ways to configure sound output for your streaming / recording. You can set these at the profile level, which will make the sound sources available for all the scenes automatically in the current contour, or you tin can configure sound sources specifically per scene.
To configure audio at the profile level, get to the menu "Settings -> Audio" and then select the appropriate devices you desire to enable, and disable the ones you don't need.

For my streams I apply the default estimator output as audio source, this is easier because anything y'all play will be streamed as audio - the only trouble is that this will also include Google calendar reminders, slack notifications, and any alarm sounds that might prove up while you're streaming.
You can also gear up an "Audio Output Capture" source for a specific scene:

One time yous include audio sources, your "Audio mixer" window volition exhibit a live view with the audio levels of all your agile audio "tracks".

Recording Presentations with OBS
With OBS you tin record your content without alive streaming, which is a great way of preparing pre-recorded alive presentations. Because you lot can as well use a video as source, goose egg prevents you lot from pre-recording your stream and and so using the recorded video (edited if necessary) as source for a live stream. Well-nigh online conferences happening these days are choosing this model over alive presentations, because then the speaker tin join the alive conversation and interact / answer questions to the audition while the pre-recorded talk is being streamed.
Recordings are saved in the output directory ready in OBS'south configuration. This will exist prepare to your dwelling house directory past default. To change this location, admission the menu "Settings -> Output -> Recording path".

The controls to first / finish recording are located at the bottom correct of the screen. Once you start recording, everything you run into in the preview window will be recorded.

Live Streaming with OBS
In order to be able to stream via OBS, y'all'll outset need to set up your personal streaming fundamental/token in OBS'south configuration. You can obtain this information in the streaming platform you'll exist using (Twitch, YouTube, etc).

You can fix multiple streaming profiles, this way you can switch between streaming platforms easily.

In one case you click the "Start streaming" button, OBS wil commencement broadcasting your scenes to your streaming service. Everything you meet in your preview window will be streamed to your audition.
In your settings, y'all can configure OBS to start recording automatically when you start a new streaming. This is useful if you plan on editing and/or uploading the video stream to another platform after.
Bonus: Post Product Tips & Tricks with FFMPEG
Alive streaming is fun and heady, but beingness able to mail service the recorded video to your Youtube channel and other platforms is a valuable mode to maximize your content reach. A tool similar FFMPEG can assist with some batch operations and simple editions that don't crave a fully fledged video editor such as OpenShot (my personal favorite). Hither's some tricks I've learned with ffmpeg that could be useful for you lot also:
Converting to MP4
Converting to unlike formats is quite straightforward with ffmpeg:
ffmpeg -i input_video.mkv output.mp4 Speeding Upwardly Videos
On DevOps & Chill, I don't talk, I only type. I gauge it's non a big deal while it's happening alive, simply I find the resulting video simply actually deadening, so I like to speed upward the videos to 2x the original speed. This is how you do it with ffmpeg:
ffmpeg -i input_video.mkv -an -filter:v "setpts=0.5*PTS" output.mkv This will remove the audio from the video (-an option). Removing the audio is necessary because when you speed upward without changing the audio, the FPS won't match anymore, and this can cause trouble during playback. And you probably don't desire to speed up the audio as well ;) See the adjacent tips for how to bargain with audio.
To speed upwards all videos in a directory, you can utilise this i-liner shell script:
for i in *.mkv; do ffmpeg -i "$i" -an -filter:5 "setpts=0.5*PTS" "${i%.*}_fast.mkv"; done Extracting Audio from Video
This will excerpt the audio track from the video and save it to a .aac file.
ffmpeg -i input_video.mkv -vn -acodec re-create output_audio.aac The resulting .aac file can then be converted to .mp3 if you wish:
ffmpeg -i output_audio.aac output_audio.mp3 Generate a playlist with mp3 files
This will concatenate the listed .mp3 files into one sound file.
ffmpeg -i "concat:song01.mp3|song02.mp3|song03.mp3|song04.mp3" -acodec copy video_playlist.mp3 Include a new sound track in a video
This will insert the video_playlist.mp3 audio rail in the video.
ffmpeg -i input_video.mkv -i video_playlist.mp3 -c copy -map 0:v:0 -map i:a:0 input_video_with_music.mkv Conclusion
OBS Studio is a powerful, gratuitous and open source software for recording and streaming live presentations. In one case you lot become familiarized with its interface and how to configure scenes with sources, you'll see it's not difficult to use it, and information technology will enable yous to perform professional live streaming and video presentations using only your computer.
There are certainly many unlike ways to configure OBS to adapt your needs, depending on what kind of content you want to nowadays. Play around with dissimilar settings and experiment until you lot notice the scenes that piece of work best for y'all! I hope y'all'll now feel empowered to start that live streaming idea you've been postponing :) what time better than at present?
mccalebalidereces.blogspot.com
Source: https://eheidi.dev/blog/how-to-use-obs-studio-to-record-or-stream-live-presentations-474j
0 Response to "How to Use Obs to Record and Upload"
Post a Comment